You’re driving along when you see another car with a brake light out, and the thought hits you: “Wait, are mine working?” It’s a valid concern, since you can’t exactly see them from the driver’s seat. A non-working brake light is a safety risk you might not even know you have. Before you can fix the problem, you have to know it exists. This guide will first show you a few simple tricks to check your own brake lights without needing a helper. Then, we’ll walk you through every step of the brake light bulb replacement process. It’s a quick and easy fix that ensures you’re seen and safe on the road. If you’d rather have a professional take a look, our Quick Check service can diagnose any lighting issues for you.
Key Takeaways
- Check your lights and find the right part: You can easily test your brake lights alone by backing up to a reflective surface like a garage door. To find the correct replacement bulb, check your owner’s manual or use an online bulb finder tool with your car’s make and model.
- Proper handling prevents common mistakes: Always wear gloves or use a cloth when handling the new bulb, as oils from your skin can cause it to burn out prematurely. Be patient with plastic clips and sockets, because forcing stuck parts can cause them to break.
- Know when to troubleshoot or call for help: If a new bulb doesn’t work, check for simple fixes like a blown fuse or corrosion on the socket’s metal contacts. If the problem seems electrical or the assembly is too difficult to reach, it’s best to call a professional.
Is Your Brake Light Out? Here’s How to Tell
It’s a common worry for any driver: is one of my lights out? Functional brake lights are non-negotiable for safety, signaling your every move to the cars behind you. A single burnt-out bulb can increase your risk of a rear-end collision, but you don’t have to wait for a police officer to point it out. Thankfully, checking your brake lights is a simple task you can do right in your driveway. There are a few straightforward ways to tell if a bulb needs replacing. You can perform a quick visual inspection for obvious signs of failure, keep an eye on your dashboard for any warning indicators, or use a simple reflection trick to test them without needing a second person. Knowing what to look for will give you peace of mind and help you address a small problem before it becomes a real safety hazard. If you spot an issue and aren’t sure what to do next, a Quick Check can give you a clear answer without the hassle of a garage visit.
What to Look For
The most direct way to check your brake lights is to simply look at them. Ask a friend or family member to stand behind your car while you press the brake pedal. They should check that all three brake lights (left, right, and the center one) illuminate brightly. You’ll know it’s time to replace a tail light if it appears dim, flickers, or doesn’t turn on at all. Also, take a look at the plastic cover, or lens. If it’s cracked or badly discolored, it can reduce the light’s visibility and should be replaced, even if the bulb inside still works.
Understanding Dashboard Warnings
Your car is pretty smart and often does the monitoring for you. Many modern vehicles have a dashboard warning light that will illuminate if it detects a problem with your brake system or a burnt-out bulb. This symbol often looks like a light bulb icon with an exclamation point inside or the word “BRAKE.” While these indicators are helpful, it’s crucial to act on them quickly. A non-working center brake light, for instance, can significantly increase your risk of a rear-end collision. If a warning light pops up, consult your owner’s manual to confirm what it means for your specific vehicle and get the bulb checked right away.
A Simple Way to Test Your Lights
Don’t have an extra person to help you check your lights? No problem. You can easily test them on your own with a simple trick. Wait until it’s dark outside and back your car up close to a reflective surface like a garage door, a wall, or a large store window. While the car is in park, press the brake pedal. Now, just look in your rearview mirror. You should be able to see the red glow of all three brake lights reflecting back at you. This is also the perfect way to confirm everything is working correctly after you replace a bulb. It’s a quick, effective check that takes less than a minute.
How to Find the Right Replacement Bulb
Before you can swap out that burnt-out brake light, you need to get your hands on the right replacement bulb. Cars are particular, and not just any bulb will do. Using the wrong one can lead to electrical issues or a light that simply doesn’t work. The good news is that finding the correct part number is a straightforward process, and you have a few simple options to get it right the first time.
Think of it like a mini-investigation. You can consult your car’s official guide, use a handy online tool, or examine the evidence yourself. Each method will lead you to the exact bulb your vehicle needs to stay safe on the road. And if you ever feel like this is one task you’d rather skip, our Quick Check plan includes a full lighting inspection to handle it for you.
Check Your Owner’s Manual
Your car’s owner’s manual is the most reliable source of information for just about any DIY task, including finding the right bulb. Tucked away in your glove compartment, this guide contains everything the manufacturer wants you to know. Flip to the maintenance or lighting section, and you should find a chart listing all the bulb types for your vehicle. Look for the brake light specification, which will be a specific number like “7443” or “P21/5W.” The manual often includes helpful diagrams showing you exactly where the bulbs are located, making it a great starting point.
Use an Online Bulb Finder
If you can’t find your owner’s manual or prefer a digital approach, an online bulb finder is your best friend. Most major auto parts retailers have a bulb finder tool on their websites. All you have to do is enter your vehicle’s year, make, and model. The tool will then generate a list of all the bulbs that fit your car, from headlights to brake lights. This method is quick, easy, and takes the guesswork out of the equation, allowing you to order the correct part with confidence in just a few clicks.
Match the Old Bulb
Another foolproof method is to simply match the old bulb. Once you’ve removed the burnt-out bulb from the brake light assembly, take a close look at its base. You’ll usually find the part number printed directly on the metal or plastic housing. The text can be tiny, so you might need good lighting or even your phone’s camera to zoom in. With the part number in hand, you can head to the store. For extra assurance, bring the old bulb with you to compare it side-by-side with the new one before you buy.
What You’ll Need to Replace Your Brake Light
Before you start unscrewing panels, it’s a good idea to gather all your supplies. Having everything you need within arm’s reach makes the job much faster and less frustrating. Think of it like cooking: you wouldn’t start a recipe without getting your ingredients out first. A little preparation goes a long way in ensuring the process is smooth and simple. Luckily, you don’t need a full mechanic’s toolkit for this task. Most of what you’ll need is probably already in your garage or a basic home toolset. Let’s walk through the essentials for the job, your safety, and picking out that all-important bulb.
The Right Tools for the Job
You’ll be happy to know the tool list for this project is pretty short. The main items you’ll need are a screwdriver (usually a Phillips head) and potentially a small ratchet set to remove the tail light assembly. Of course, you’ll also need your replacement bulb. Some people like to use a dab of dielectric grease on the bulb’s base to prevent corrosion and make future changes easier, but it’s not always necessary. Having a clean cloth or rag on hand is also helpful for wiping away any dust or grime you find inside the light housing.
Essential Safety Gear
Even for a quick fix like this one, safety should always come first. You’ll want to wear a pair of gloves to protect your hands from dirt and any sharp edges inside the assembly. It’s also smart to wear safety glasses, just in case any small plastic parts or debris come loose. While it’s not strictly required for a simple bulb change, some guides recommend disconnecting your car’s battery as an extra precaution. This eliminates any risk of a short circuit. If you choose to do this, just remember you’ll likely need to reset your clock and radio presets afterward.
Choosing the Correct Bulb
This might be the most critical step of your prep work. Installing the wrong bulb can cause electrical issues or simply not work at all. As we covered earlier, your owner’s manual is the best place to find the exact bulb number your car requires. If you don’t have the manual handy, you can use an online bulb finder which allows you to enter your car’s make and model. The easiest method is often just to remove the old bulb first and take it with you to the auto parts store to find an exact match.
Your Step-by-Step Guide to Replacing a Brake Light
Alright, you’ve got your new bulb and you’re ready to get it done. Replacing a brake light is one of the most straightforward DIY car tasks, and it’s a great way to get more comfortable with your vehicle. The whole process usually takes less than 15 minutes. Just follow these simple steps, and you’ll have that light working in no time. Remember to work in a well-lit area, especially if you’re doing this in the evening. Safety and visibility are key to making this a quick and easy fix.
Prep Your Car and Workspace
First things first, park your car on a level surface and turn off the engine. For safety, put the parking brake on. Gather your new bulb and any tools you might need, like a screwdriver or a small socket wrench, though many cars don’t require any tools at all. It’s also a great idea to wear a pair of clean gloves. The oils from your skin can create hot spots on the new bulb’s glass, causing it to burn out much faster. Keeping the bulb clean from the start helps it last as long as possible.
Get to the Brake Light Assembly
Now, let’s find that bulb. Open your trunk or rear hatch. Look for a small panel or fabric cover on the interior trim directly behind the tail light. On most sedans and coupes, this is pretty easy to spot. You might need to pop off a plastic cover, unscrew a few fasteners, or simply pull back a piece of carpeting to access the assembly. Once you have it open, you’ll see the back of the tail light and the wires leading to the different bulb sockets. The brake light socket is usually the largest one or is labeled.
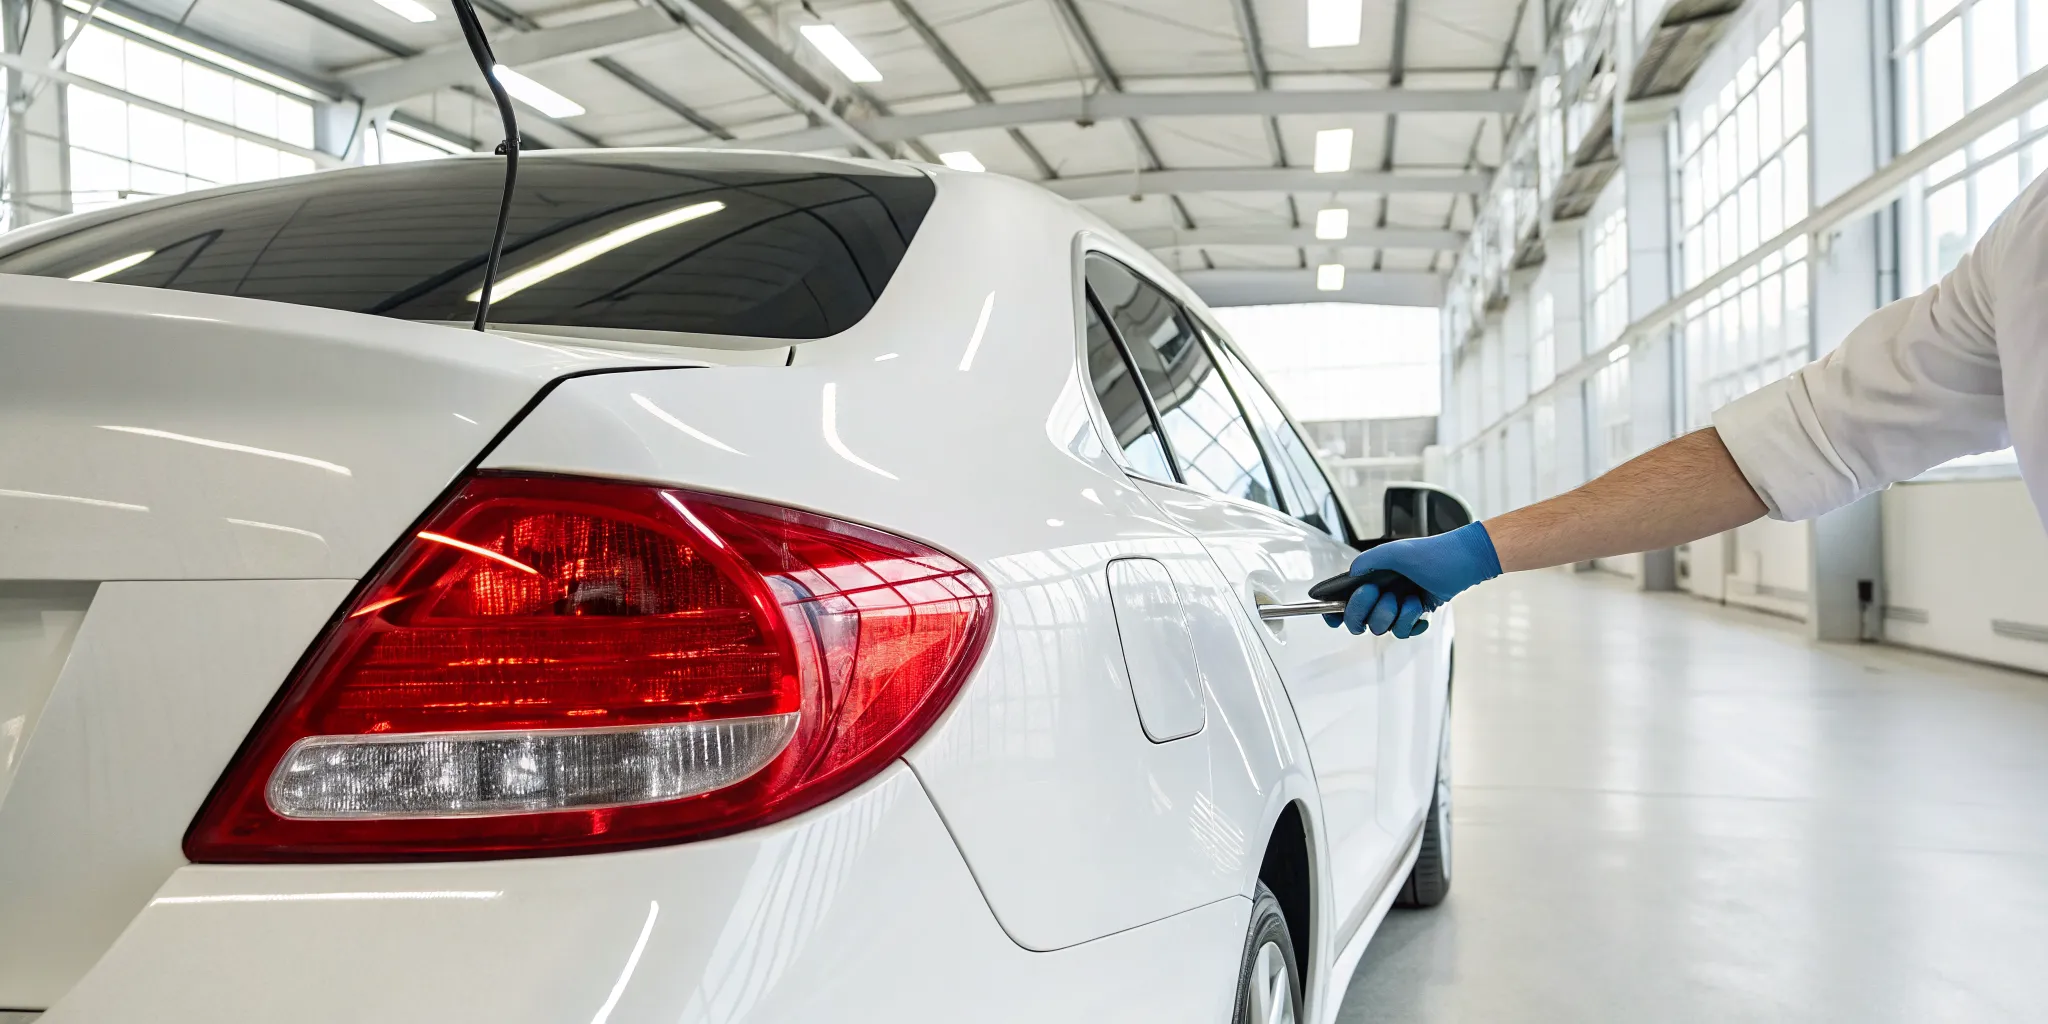
Safely Remove the Old Bulb
With the back of the assembly exposed, identify the socket for the burnt-out brake light. To remove it, grip the plastic base of the socket and twist it counter-clockwise about a quarter turn. It should pop loose, allowing you to pull the socket and the old bulb straight out of the housing. To get the bulb out of the socket, gently push it in, twist it to the left, and it will release. Be careful not to use too much force, as the old bulb can be fragile and might break.
Install the New Bulb
Time for the new bulb. Making sure you’re still wearing your gloves, take the new bulb and line up the small pins on its base with the slots in the socket. Push the bulb in gently and twist it clockwise to lock it into place. You’ll feel a slight click when it’s secure. Once the new bulb is in the socket, guide the socket back into the tail light housing. Align the tabs, push it in, and twist it clockwise until it locks firmly. Give it a gentle tug to make sure it’s snug.
Test Your New Light
This is the moment of truth. Before you put all the covers and panels back on, it’s essential to check your work. Have a friend hop in the driver’s seat and press the brake pedal while you stand behind the car to confirm the new light works. If you’re working alone, you can back your car up close to a garage door or a storefront window at night. You’ll be able to see the reflection of the brake lights clearly when you press the pedal. Once you see it glowing brightly, you’re all set.
What If the New Brake Light Doesn’t Work?
You’ve gone through all the steps, popped in the new bulb, and… nothing. It’s a frustrating moment, but don’t throw in the towel just yet. When a new brake light bulb doesn’t work, it usually means the problem isn’t the bulb itself but something else along the electrical path. The good news is that you can often find the culprit with a little more investigation. Before you assume the worst, let’s walk through a few common issues that could be preventing your new light from shining bright. Most of the time, it’s a simple fix related to the connection, the socket, or a fuse.
Check the Electrical Connections
The most common reason a new bulb won’t light up is a poor electrical connection. The bulb needs a clean, solid contact point to draw power, and over time, these connections can get dirty. Turn off your car and take another look inside the brake light socket. Do you see any white or greenish crusty buildup on the metal contacts? That’s corrosion, and it’s a major barrier for electricity. A poor connection can also happen if the wires leading to the socket are loose. Gently wiggle the wires to make sure they feel secure. If you see any corrosion, you can often clean the electrical contacts with a small wire brush or a pencil eraser to restore a clear path for power.
Inspect the Socket for Damage
While you’re looking at the connections, give the entire socket a thorough inspection. Sockets live in a tough environment and can get brittle or damaged from heat and moisture. Look closely for any signs of melting, cracks in the plastic, or deep rust that you can’t simply brush away. A damaged socket might not hold the bulb securely, leading to a flickering or dead light. If the socket looks warped or broken, it won’t be able to provide the stable connection the bulb needs to function properly. In this case, the socket itself will need to be replaced, which is a bit more complex than just changing a bulb.
Test the Fuse and Brake Light Switch
If the socket and connections look good, the issue might be further down the line in your car’s electrical system. Your first stop should be the fuse box. Your car has a series of fuses that protect its electrical components, and a blown fuse could be the reason your brake lights aren’t getting power. Your owner’s manual will show you where to find the fuse box and which fuse corresponds to the brake lights. You can usually tell if a fuse is blown by looking for a broken wire inside it. If the fuse is fine, another possibility is a faulty brake light switch. This switch is located by your brake pedal and tells the lights to turn on when you press the pedal. If this is the problem, it’s often a job best left to a professional, since it involves working under the dashboard.
Common Types of Brake Light Assemblies
Before you can swap out that bulb, you first have to get to it. Car designers place brake lights in a few common spots, and knowing which setup your vehicle has makes the job much smoother. Most cars fall into one of three categories, so let’s walk through how to access each type. This knowledge will help you feel more confident tackling the replacement yourself. If you ever feel unsure, remember that a professional service like our Quick Check Plan can handle these small but important tasks for you.
Accessing Trunk-Mounted Lights
If you drive a sedan or coupe, your brake lights are likely mounted in the trunk lid or on the rear corners of the car. This is often the most straightforward setup. To get to the bulbs, just open your trunk and look for the back of the light assembly. You’ll probably see a fabric or plastic panel covering the wiring. This panel usually comes off easily, sometimes with just a few clips you can pop out by hand or with a flathead screwdriver. Once it’s out of the way, you’ll have a clear view of the bulb sockets. Simply twist the socket, pull it out, and you’re ready to change the bulb.
Getting to Bumper-Mounted Lights
Some cars, especially those with slim tail lights, have extra brake lights built into the rear bumper. This design choice keeps your car visible, but it can make bulb replacement trickier. Depending on your vehicle, you might need to get underneath the car or remove parts of the bumper cover to reach the assembly. Check your owner’s manual for specific instructions, as this process can be more involved. If it looks too complicated, don’t hesitate to call for help. It’s better to be safe than to accidentally damage your bumper.
How to Access Lights on Hatchbacks and SUVs
Hatchbacks and SUVs often use a two-part system for safety. You’ll find one set of lights on the hatch itself and another on the bumper or body. This ensures your brake lights are visible even when the hatch is open. To access the hatch-mounted lights, open the liftgate and look for an interior panel you can remove. For the lower lights, you might need to go through the cargo area. Don’t forget about the third brake light, or high mount lamp assembly, at the top of the rear window. You can usually get to this one by carefully prying off the interior plastic trim that surrounds it.
Common Mistakes to Avoid
Replacing a brake light is a straightforward job, but a few common slip-ups can make it more complicated than it needs to be. Knowing what to watch out for ahead of time can save you a headache and a return trip to the auto parts store. We’ll walk through three of the most frequent mistakes DIYers make: handling the new bulb incorrectly, grabbing the wrong type of bulb, and using too much force on stuck parts. A little bit of care in these areas will ensure your replacement goes smoothly and your new light works perfectly from the start. If you run into any trouble, remember that a professional is always ready to help. Our Quick Check plan is perfect for getting an expert eye on small issues like this.
Why You Shouldn’t Touch the Glass
This might sound overly cautious, but it’s a pro tip for a reason: avoid touching the glass part of the new bulb with your bare hands. The natural oils on your skin can transfer to the bulb, creating “hot spots” when it heats up. These spots can cause the glass to weaken and lead to the bulb burning out much faster than it should. The fix is simple. Always wear a pair of clean gloves or use a lint-free cloth when handling the new bulb. This small step helps ensure you get the full lifespan out of your replacement.
Double-Check Your Bulb Type
Before you even head to the store, make sure you know exactly which bulb your car needs. It can be tempting to just grab one that looks similar, but using the wrong bulb can cause problems. At best, it won’t work; at worst, it could damage the socket or even the vehicle’s wiring. Your owner’s manual is the most reliable source for this information. If you don’t have it handy, most auto parts stores have online tools or in-store guides to help you find the correct bulb type for your specific make and model. A quick check saves a lot of trouble.
Don’t Force Stuck Parts
Sometimes, especially on older cars, the bulb socket can feel stuck in the light assembly. Your first instinct might be to pull harder, but that’s a quick way to break a plastic clip or the socket itself. If you meet resistance, stop and take a breath. Most sockets are designed to be removed with a simple quarter-turn to the left (counter-clockwise). Try wiggling it gently as you turn. Forcing a stuck part can turn a five-minute fix into a much more involved and expensive repair. Patience is key here.
Safety First: Tips for a Smooth Replacement
Before you even open your trunk, let’s talk about safety. Taking a few extra minutes to set up your workspace properly can make the entire process smoother and keep you out of harm’s way. These aren’t complicated steps, but they are the most important ones. Think of it as setting the foundation for a successful and stress-free repair. When you prioritize safety, you can feel confident tackling the job. From protecting your new bulb to protecting yourself, these simple habits make all the difference. Let’s walk through a few key tips to ensure your brake light replacement goes off without a hitch.
Be Careful with Electrical Parts
Here’s a pro tip that can save you from doing this job all over again in a few months: always wear gloves when handling the new bulb. The natural oils and salts on your skin can transfer to the glass, creating hot spots that cause the bulb to burn out much faster. It’s a small detail that has a big impact on the bulb’s lifespan. Clean gloves or even a paper towel will do the trick. This simple precaution ensures your new bulb lasts as long as it should and prevents any potential damage during the installation.
Park on a Level Surface
This might sound obvious, but it’s a critical first step. Always park your car on a flat, level spot and turn off the engine before you begin. Working on an incline is a recipe for trouble, as it increases the risk of your car rolling unexpectedly, even with the parking brake on. A level surface also gives you more stable footing and makes it easier to access the brake light assembly without straining. This simple step is crucial for your safety and makes the entire replacement process much smoother from start to finish.
Should You Disconnect the Battery?
This is a common question, and the answer depends on your comfort level with vehicle electronics. To be extra safe, you can disconnect your car’s battery to completely eliminate the risk of electric shock. While it’s not always required for a simple bulb change, it’s a smart precaution, especially if you’re new to DIY car repairs. If you choose to do this, just remember to disconnect the negative terminal first. If you feel confident and the job only involves swapping a bulb, you can often skip this step. When in doubt, taking the extra safety measure is always the best choice.
Know When to Call a Professional
While tackling a brake light replacement yourself can be really satisfying, it’s also smart to know when to tag in a professional. Sometimes, a seemingly simple fix can point to a bigger issue, or the job itself can be more complicated than you expected. Recognizing when a task is beyond a quick DIY is a key part of responsible car ownership. It saves you time, frustration, and potentially costly mistakes. Here are a couple of common scenarios where calling for help is the best move.
If You Suspect Electrical Problems
If you’ve replaced the bulb and the light still isn’t working, you might be looking at an electrical issue. A non-functioning brake light can be caused by several things beyond a burnt-out bulb. The problem could be a faulty brake light switch, a blown fuse, or even corroded wiring. These types of electrical problems require a bit more diagnostic work to pinpoint and fix correctly. While you can certainly check the fuse box yourself, tracing wiring issues is often best left to an expert. If you suspect something more is going on, getting professional help is the safest bet to ensure everything is working correctly.
When the Assembly Is Hard to Reach
You’ve opened the trunk, ready to swap the bulb, only to find the brake light assembly is tucked away or won’t budge. It’s a frustrating but common scenario. Some car designs make accessing the lights surprisingly difficult. If the assembly is hard to remove, resist the urge to force it, as you could break a plastic clip or the housing itself. Gently check for any hidden screws or clips you might have missed. If you’re still stuck or feel like you need to be a contortionist to reach it, it’s a perfect time to call for backup. A professional can handle it without causing damage, and our Quick Check plan is perfect for these situations.
Keep Your Brake Lights in Top Shape
Replacing a burnt-out bulb is one thing, but a little preventive care can go a long way in keeping your brake lights working reliably. You don’t have to be a mechanic to keep an eye on things; a few simple habits can help you spot a problem before it leaves you in the dark. Think of it as a mini-checkup for your car’s communication system. Functional brake lights are crucial for letting other drivers know what you’re doing, which is why keeping them in good shape is a non-negotiable part of road safety. A burnt-out bulb isn’t just an inconvenience, it’s a safety hazard that can lead to accidents. Plus, staying on top of it means you’re less likely to get pulled over for a broken light, saving you from a potential ticket and a roadside lecture. Taking a proactive approach to your car’s lighting system is one of the easiest ways to ensure you and your passengers are safe on the road. If you’d rather leave the check-ups to a professional, our Total Care plan includes a comprehensive 85-point wellness check that covers all your vehicle’s essential lighting and electrical systems, right in your driveway. We handle the details so you can drive with confidence.
Set a Regular Inspection Schedule
Make it a habit to check your brake lights regularly, maybe once a month or every time you fill up your gas tank. A broken tail light isn’t just a minor issue; it’s against the law and can easily cause an accident if the driver behind you doesn’t see you slowing down. Here’s a simple trick: back up toward a garage door or a store window at night and press the brake. You’ll see the reflection of your lights clearly. Or, just ask a friend or family member to stand behind the car while you press the pedal. This quick, two-minute check gives you peace of mind and keeps you safe.
Keep the Light Housings Clean
Your brake light assembly is designed to be a sealed unit, protecting the bulb and electrical socket from the elements. Over time, dirt, dust, and moisture can work their way inside, causing corrosion and connection problems. When you have the assembly open to change a bulb, take a moment to wipe down the inside with a dry cloth. A clean housing also ensures the new bulb can sit flat against the socket, creating a proper seal. This simple step is key to stopping water from getting inside and causing bigger electrical headaches down the road. A clean lens also means a brighter, more visible light for other drivers to see.
Simple Tips for Preventive Care
Here are two pro tips to make your new bulb last longer and work better. First, avoid touching the new bulb’s glass with your bare hands. The natural oils on your skin can create hot spots on the bulb’s surface, causing it to burn out much faster. Always use clean gloves or a lint-free cloth to handle it. Second, consider applying a small amount of dielectric grease to the base of the bulb before you plug it in. This special “goop” is a non-conductive, silicone-based grease that helps protect the metal contacts from moisture and corrosion, ensuring a solid electrical connection for years to come.
Related Articles
- Brake Rotor Replacement: A Step-by-Step Guide
- Brake Pad Replacement 101: Your Complete Guide
- Monthly Car Inspection Checklist for Students
Frequently Asked Questions
How often should I really be checking my brake lights? A great habit is to check all your car’s lights about once a month. It only takes a minute and can save you from a potential accident or a traffic ticket. An easy way to remember is to do it every time you wash your car or fill up your gas tank. Just back up to a reflective surface like a garage door at night and press the brake pedal to see the reflection.
Is it safe to replace a brake light myself if I have no experience with cars? Absolutely. Replacing a brake light is one of the best and most rewarding starter projects for anyone new to DIY car care. The process is usually very simple and requires minimal tools. As long as you park your car on a level surface, turn off the engine, and follow the steps carefully, it’s a very safe and straightforward task.
I put in a new bulb, but it’s still not working. What’s the most common reason for this? When a brand new bulb doesn’t light up, the issue is almost always the connection, not the bulb. The most common culprit is a bit of corrosion on the metal contacts inside the socket. Before you do anything else, take the bulb back out and inspect the socket. If you see any crusty buildup, you can often clean it off with a small wire brush to restore the connection.
Why is it so important not to touch the new bulb with my bare hands? This is a great question because it’s a small detail that makes a big difference. The natural oils on your skin can transfer to the bulb’s glass surface. When the bulb heats up during use, these oils create intense hot spots that can cause the glass to weaken and the bulb to burn out much sooner than it should. Using gloves or a clean cloth keeps the glass pristine and helps it last.
What should I do if I can’t get the light assembly open or the socket seems stuck? If a part feels stuck, the best thing you can do is stop. Don’t try to force it. Light assemblies and sockets are often made of plastic that can become brittle over time, and using too much pressure can cause a clip or the housing itself to snap. This can turn a simple fix into a more complicated repair. If it won’t budge with a gentle twist, it’s a good sign that it’s time to call a professional.